
Understanding the Matomo Tag Manager Data Layer
The ultimate guide to mastering the Data Layer
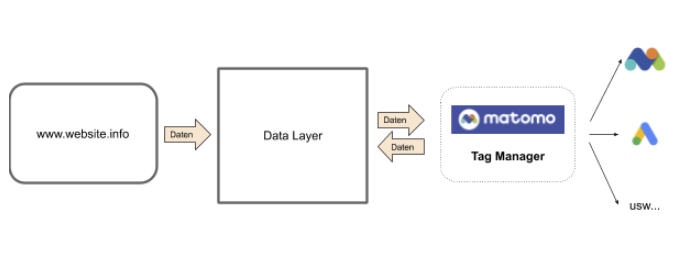
The data layer is the solution to enrich the Matomo Tag Manager with data, to provide information to the existing tags and triggers and to use this data for the control of the Tag Manager.
Without the data layer, Matomo’s Tag Manager would have no variables or triggers and that is what the tag firing is based on.
So the data layer is the linchpin to unfold the full potential of the Matomo Tag Manager.
In this article I will go into all important points concerning Matomo and Data Layer, which you should know.
It is at the same time a help to explain:
Content
- What is the data layer?
- Installing the Data Layer – How to implement it
- How does the Matomo Tag Manager use this information – What do I do with it?
- Summary
What is the data layer?
For many, the data layer is a great unknown, complicated to understand and full of inconsistencies.
He is the key to unfolding the full potential of the Matomo Tag Manager.
And also not so difficult to understand.
Technically speaking, the data layer is a JavaScript array that stores the required information.
The Tag Manager then uses this information in the tags, triggers and variables.
This information may also be transferred to other systems, for example via marketing tags on Facebook and Google.
(Even if this does not necessarily correspond to the basic principle of Matomo)
So this array is like a temporary, invisible, further layer of the website.
The visitors of the website do not see the information and content that the data layer layer has.
Since it is an invisible part of the website.
Nevertheless, if you know how to do it, you can still access the information.
Imagine the data layer is like a bucket.
The bucket can contain different balls, on each ball some information is printed as numbers or words.
This can be product information, user IDs or the category of the page, for example.
What is in the bucket of your website can also be recorded and used by the Matomo Tag Manager.
If you add information, i.e. more balls, to the bucket, the Tag Manager can use them from that point on.
This can then be used to control triggers for tags or the Matomo Tracking can be enriched with information that it cannot know by default.
The following figure shows the function of the data layer.
It happens again and again that developers do not know the data layer.
Because not every website owns it, not everyone who has implemented tracking uses it.
But to have a clean tracking and to simplify the work between analysts, developers and external consultants, it is recommended to know it and also to know how such a data layer works.
Installing the Data Layer – How to implement it
It often happens that the question is asked how a data layer is to be built into the website.
The documentation of Matomo
can be somewhat confusing.
Also in the help for embedding the Tag Manager
it is often not immediately clear what to do.
If no additional page information needs to be available at the time of loading the Tag Manager, such as user IDs or product data, there is nothing else to do than to include the Matomo Tag Manager code in the source code of the page.
Because as soon as the JavaScript snippet of the Matomo Tag Manager is inserted into the source code of the website and it is loaded by a page visit, the data layer is automatically initiated by the JavaScript snippet.
Now the data layer is available, but it is still empty.
But as you can imagine it is possible to extend the Matomo Data Layer.
For this purpose, data and information is added or overwritten.
They are present until a page change takes place or the page is reloaded.
Adding user- or page-specific information I will explain in more detail in the further course of this article.
But since such information mostly comes from the backend or is collected via a tracking script, it is good if a web developer takes care of it.
Here is an example of the container snippet of Matomo Tag Manager.
It is available for every Matomo installation and can be easily removed in the settings by copy&paste.
<Matomo Tag Manager.>
<script type="text/javascript">
  var _mtm = window._mtm = window._mtm [];
  _mtm.push({'mtm.startTime': (new Date().getTime()), 'event': 'mtm.Start'})
  var d=document, g=d.createElement('script'), s=d.getElementsByTagName('script')[0];
  g.type='text/javascript'; g.async=true; g.src='https://{$MATOMO_URL}/js/container_{$CONTAINER}.js'; s.parentNode.insertBefore(g,s);
</script>
<End Matomo Tag Manager.>
Declare the data layer
How is the data inserted into the data layer?
Because once the data layer is created it is (almost) empty from the beginning.
To get the full benefit
and fun
Imagine that you now fill your empty bucket with balls, which of course have all kinds of information printed on them.
There are two ways to do this:
- Deploy the Matomo Data Layer before the Matomo Tag Manager Code
- by “pushing” of information by means of a _mtm.push
Declare the data layer – Deploy the Matomo data layer before the Matomo Tag Manager code
In my opinion, the first method belongs on every website.
So that you can get them tracked properly.
To do this, insert the data layer before the Tag Manager Code.
Based on values provided by the CMS, the Tag Manager can then be enriched with this information.
Via the Tag Manager settings (variables) they can then be captured when the page is called up and forwarded to Matomo Tracking.
This way you can provide for example product data, page ID (some of you know it from WordPress) or, if a user is already logged in, the user ID.
Standard Tracking cannot collect or know such information.
So we help with this and organize what is recorded and tracked.
And since these values already exist when the Tag Manager is loaded, it can also use them for custom dimensions or event tags.
It could look like this:
<Static data layer.>
<script>var_mtm = _mtm|| [];
_mtm.push({
'pageValue': '0.5',
'pageTitle': document.title
});
</script>
<Static Data Layer End -->


<Matomo Tag Manager.>
<script type="text/javascript">
var _mtm = _mtm [];
_mtm.push({'mtm.startTime': (new Date().getTime()), 'event': 'mtm.Start'})
var d=document, g=d.createElement('script'), s=d.getElementsByTagName('script')[0];
g.type='text/javascript'; g.async=true; g.defer=true; g.src='https://your.domain.de/js/container_12345.js'; s.parentNode.insertBefore(g,s);</script>
<Matomo Tag Manager.>
_mtm.push
The following method is used to fill the data layer with additional information.
Push commands are used to enrich the data layer, the array, with additional attributes.
The Tag Manager can then record these events and send them to Matomo Tracking.
Here are a few examples.
Write a variable to the data layer, make it available:
var _mtm = _mtm [];
window._mtm.push({
  "productColor": "black
});
Write a specific event to the data layer:
var _mtm = _mtm [];
window._mtm.push({
  'event': 'purchase'
});
A site visitor has added a product to the shopping cart:
var _mtm = _mtm [];
window._mtm.push({
  'event': 'addToCard',
  'productID': 'A1B2C3',
  productPrice: '123
});
Note: It is not absolutely necessary to use window._mtm.
But it has already proven to be helpful with one or the other website.
How does the Matomo Tag Manager use this information – What do I do with it?
The Matomo Tag Manager can do two things with it.
- It can read certain values assigned to a variable.
- With the event information, he can listen for these and then fire certain tags via a trigger (also known as impulse).
Reading variables
Now let’s assume your website has different categories.
A blog, contact, home page and maybe even a product overview and product detail page.
Matomo cannot know where the visitor of the site is at the moment.
If you want to record all actions and events, by category or page type, you must provide additional information.
You can provide it via the data layer of the Matomo Tag Manager.
For this purpose, a static data layer must be provided before the container Snipped.
It could look like this:
<head>
<script> var _mtm = _mtm [];
_mtm.push ({
'pageCategory': 'Blog'
});
</script>
<script>
<Matomo Tag Manager.>
<! -- ....abcs.js... -->
<End Matomo Tag Manager.>
</script>
</head>
Now Matomo can read out the stored value from the data layer right at loading and you can add it, for example, to a custom dimension.
This would make it possible to group all page categories such as the blog, product overview pages or the detail pages and compare their performance.
Here
a nice example from the Matomo Demo
.
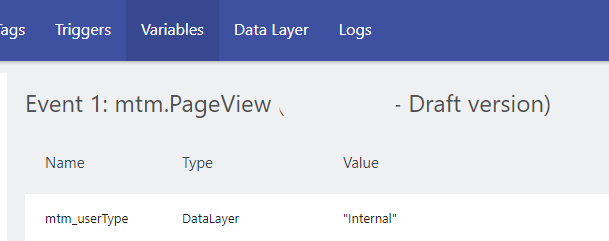
Another example based on a user who is logged in to the website via his account:
A user is logged in via the backend of the page and has already received the value ‘Internal’ (by a previous data layer push) when visiting the page.
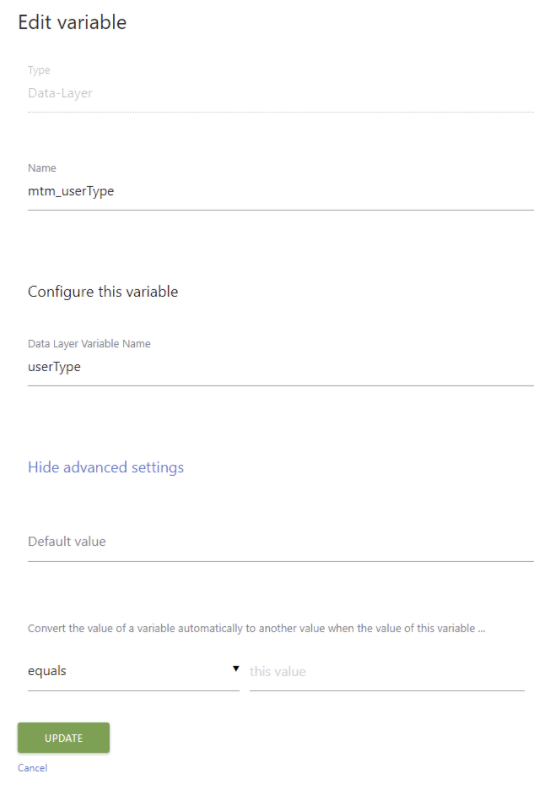
When the page is called up (Pageview Event in the Tag Manager) it already has a defined userType.
The userType is a variable from the data layer of the Tag Manager, which the page owner has created there.
The Matomo Tag Manager Data Layer

When logging off, the variable is updated via a data layer push.
This happens, for example, via a script that manages the login function.
_mtm.push({
  'event': 'mtEvent',
  'userType': 'undefined'
  });
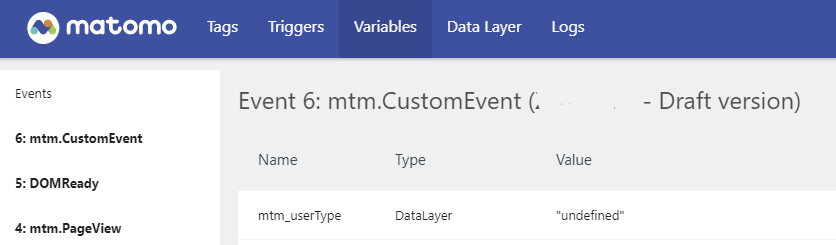
What happened here?
The data layer push event sent an event with the name mtEvent to the data layer.
In addition, the variable userType was rewritten with a value of undefined (as string).
Since the user is no longer logged in, he will be marked as “undefined” on each subsequent visit to the site.
The comparison with the sticker
You can imagine it as if you can enter a house through two doors.
If you take the left door you get a blue sticker, if you go through the right door you get a red sticker.
This attribute is valid until you remove the sticker.
But now you can change, remove or update these attributes.
This would give you more stickers, remove or exchange them.
And through this one could then make certain classifications.
No matter which room you enter in the house, those present there could see which attributes you possess via the stickers.
Attention:
It is always the last set value of the same variable that is considered current.
The update overwrites the previous value!
A new data layer must be created for each page.
A good example for a better understanding is:
When switching from the start page to the contact form, the data layer is not transferred.
This also makes sense, since the attributes can change.
Intercept values from variables
Let’s follow the example with the variable userType.
In the Matomo Tag Manager you can catch the value of the variable userType with the help of a variable.
This variable must be available first.
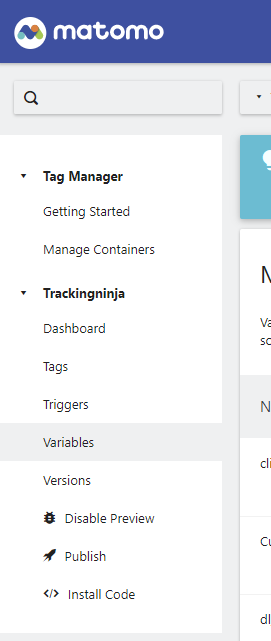
To do this, a variable must be created in the Tag Manager, under Variables.
To do this, simply call up this area in the Tag Manager and select CREATE NEW VARIBLE.
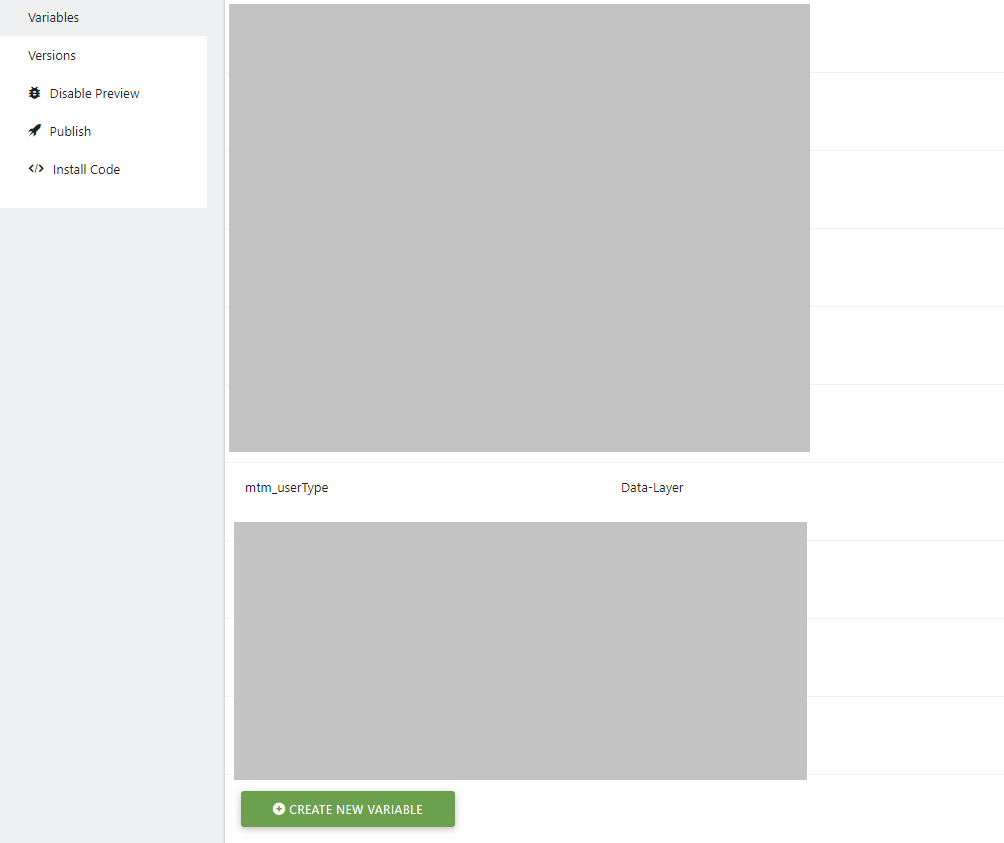
By this you add an additional varibale to the Matomo Tag Manager Data Layer.
This can then be used.
I hope that this example makes it a little bit more understandable what the Matomo Data Layer is and how to use the Data Layer.
A variable was created for this purpose and a new value was assigned to it as an example.
Where does that leave us?
Based on events, tags and the variables, you can create a tailor-made tracking based on the necessary requirements.
This could then enable the following interaction.
An event can act as a trigger, then a tag is fired, e.g. a download event, which should be recorded in Matomo.
This tag for contains a custom dimension, which gets its value from an existing variable.
Summary:
This was certainly not so easy now (and the contribution will grow a little bit with time).
Since the use of variables and tags has not yet been explained in detail.
Matomo Tag Manager Data Layer is an important part of Matomo Tracking.
Event tracking can thus be made more dynamic, a new tag does not need to be created for all page interactions.
So it allows us to capture interactions (using them as triggers) and retrieve additional data about the interaction or the page content (using the variables of the data layer).
I am aware that at the beginning it is difficult to internalize and apply this concept.
Even more so because this article still does not represent everything that is possible.
Try it out!
Feel free to leave a comment on the page or contact me if you have any questions.